
Age is the only creature Koji has yet to fathom. I, too, have the illness snooze and, even in my dreams, I was tormented by the thought of several apparent and illusory infections occupying me like a bed infestation, a soon-to-be-reality. I felt a prickling, enjoyable sensation in my arm, my knees began to hurt, and… awaken, was the mysterious phrase that punctured my slumber.
When I came, I was confronted by a strange disquiet and a chilly tide, resting in a bed I barely recognized. The only thing I remember was a volcanic voice clasping my knees, guiding me to the zen that is no knees to zen. I, for the very first time, was not concerned with the thought of effortless descent, but the jeopardy that lay in the thought of intrusive collapse.
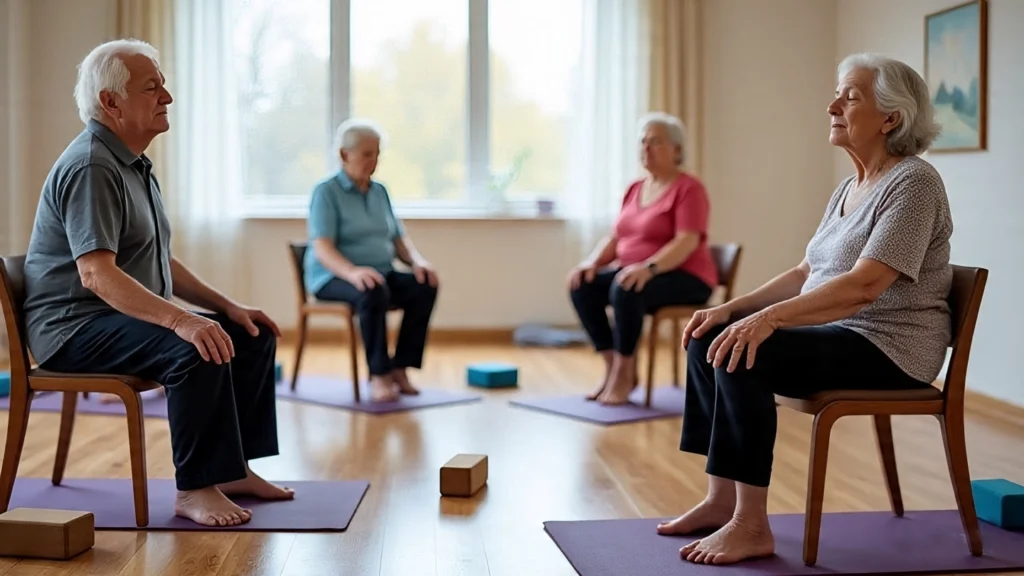
I felt my world getting smaller. I thought my days of feeling strong, flexible, and energized were behind me. That was until a physical therapist friend of mine mentioned chair yoga. I’ll admit, I was skeptical. Yoga in a chair? How could that possibly do anything?
But I was desperate, so I tried it. And friends, it changed everything for me. This isn’t about twisting yourself into a pretzel or chanting. This is about reclaiming your body, your independence, and your vitality. This is my practical, no-fluff guide to chair yoga for seniors. I’m going to show you exactly what I did, the poses that worked for me, and the real, science-backed benefits you can expect.
Why I Swear By Chair Yoga For Seniors: The Tangible Benefits You Can’t Ignore
I’m not an advocate for yoga; I consider the facts. Let us now consider the real facts of what chair yoga does. There is a myth that chair yoga is just “stretching in a chair.” It’s much more active than that. It is a comprehensive yoga practice that is gentle in intensity, designed for the body, and has traditional yoga poses modified for certain needs. The benefits are real, and they are massive.
1. It Dramatically Improves Balance and Prevents Falls.
This was my biggest win. As we age, our balance can waver and a fall can be a serious event. A study published in The Annals of Internal Medicine found that a tailored yoga program for seniors reduced falls by 48%. Chair yoga builds strength in the stabilizing muscles in your legs and core. Poses like Tree Pose and Mountain Pose, which I’ll show you, train your body to find and hold its center of gravity. For me, this meant feeling confident walking on uneven pavement again. That’s a game-changer.
2. It Increases Flexibility and Joint Health Without Pain.
I used to wake up stiff. My shoulders were tight, and my hips felt locked up. Chair yoga uses gentle, controlled movements to increase your range of motion. You’re not forcing anything. You’re coaxing your body back to life. Let me say that again: forty-eight percent. The Cat-Cow pose became my best friend for spinal mobility. Improved flexibility means less pain, easier movement, and that feeling of being oiled and ready for the day.
3. It Builds Real, Functional Strength.
Don’t let the chair fool you; you will get stronger. Holding poses like Chair Pose (not covered here, but a powerhouse) or using the chair for support in standing poses forces your muscles to work. We’re talking about leg strength to get out of a car, core strength to maintain good posture, and arm strength to lift a grocery bag. This is practical, usable strength that supports independent living.
4. It Supports Heart and Brain health. Yoga is a mind-body practice. I did into focused breathing, which we call Pranayama, that calms my nervous system. It brings down my blood pressure and also quietens the non-stop chatter in my head. In 2019, a review of research reported that yoga does as good a job as aerobic exercise in reducing heart disease risk factors. To me, a 20-minute session leaves me feeling at once relaxed and full of energy, a mix which I did not think I would get from yoga.
My Essential Toolkit: What You Need to Get Started
You don’t need much. That’s the beauty of it.
- A Sturdy Chair: I use a simple dining room chair. No wheels. It needs to be solid and not slide around. I sometimes put it against a wall for extra stability when I’m first trying a new standing pose.
- Comfortable Clothing: Wear something that lets you move freely. I wear a loose t-shirt and sweatpants.
- Space: Just enough room to stretch your legs out and move your arms without hitting anything.
- Yourself: That’s it. No special shoes needed. I practice in my socks.
Listen to your body, which is the main rule. A gentle stretch is what you should aim for; sharp or shooting pain means you should stop. If you have a specific health issue that includes your spine, hips, or blood pressure, get in to see your doctor first. I did, and it gave me the go-ahead to proceed safely.
My Go-To Seated Chair Yoga Poses to Practice at Home
These are the poses that form the foundation of my practice. I do these every single morning. Hold each pose for three to five deep breaths, unless otherwise noted.
1. Mountain Pose (Tadasana) – Seated
This is all about finding perfect posture. It seems simple, but it’s the base for everything else.
- How I Do It: I sit tall towards the front of my chair, feet flat on the floor, hip width apart. I press my feet down and feel my spine lengthen. I roll my shoulders back and down and place my hands on my thighs. I close my eyes and breathe, feeling like a solid mountain.
2. Seated Cat-Cow (Marjaryasana-Bitilasana)
This is my go-to for waking up my spine. It massages the vertebrae and relieves stiffness in my back and neck.
- How I Do It: I sit tall with my hands on my knees. On an inhale, I arch my back, push my chest forward, and look slightly up (Cow). On an exhale, I round my spine, tuck my chin to my chest, and pull my navel in (Cat). I move with my breath, repeating this flow five to ten times.
3. Seated Spinal Twist (Bharadvajasana I)
This is fantastic for digestion and rotational mobility. Turning to look behind me in the car is easier because of this pose.
- How I Do It: I sit at an angle in the chair (side of me against the chair back). I breathe in to sit tall, and as I breathe out, I gently rotate my torso toward the chair back. I use my hands on the chair back to deepen the twist gently. I hold, then slowly release and switch sides.
4. Seated Cow Face Pose (Gomukhasana) – Arms Only
This opens up my shoulders and chest, which get tight from sitting. I only do the arm variation.
- How I Do It: I reach my right arm up, bend the elbow, and let my hand drape down my back. My left arm reaches down and behind my back, bending the elbow to try and clasp my fingers. If I can’t clasp, I use a strap or a towel. I hold, breathe, and then switch arms.
5. Seated Eagle Pose (Garudasana) – Arms Only
Another great one for shoulder mobility and upper back strength.
- How I Do It: I extend my arms out in front of me. I cross my right arm over my left, then flex my elbows. I try to press my palms together, or if that’s too much, I cross my arms and hold. I feel a deep stretch between my shoulder blades.
Using the Chair for Support: My Standing Poses for Balance and Power
This is where the real functional strength gets built. The chair is there for support, allowing me to work on balance without fear of falling.
1. Standing Mountain Pose (Tadasana)
- How I Do It: I am behind the desk, gripping the backrest. My feet are set apart so that each stands at the width of a hip. My weight is distributed evenly in all corners of the feet. I also engage my thighs, spine, and, in addition, roll the shoulders back. My arms are resting at either side. My power pose is set.
2. Tree Pose (Vrksasana)
A quintessential balance pose. The chair makes it accessible.
- How I Do It: I stand beside my chair, my left hand lightly on it for support. I shift my weight to my left foot. I place my right foot on my left ankle, my calf, or if I’m feeling steady, my inner thigh (never on my knee). I find a point to focus on, hold, then switch sides.
3. Standing Half Forward Bend (Ardha Uttanasana)
This is a fantastic hamstring stretch that doesn’t require me to bend all the way over.
- How I Do It: I stand facing my chair. I hinge at my hips, keeping my back absolutely flat, and lower my torso until it’s parallel to the floor. My hands rest on the chair seat. I feel a deep stretch in the backs of my legs.
4. Puppy Pose (Uttana Shishosana) Over Chair
A incredible release for my entire spine and shoulders.
- How I Do It: I stand in front of my chair. I put my forearms on the chair seat and step back with my legs until my body is in an L shape. I allow my head to drop and notice my spine lengthen.
5. Supported Extended Triangle Pose (Utthita Trikonasana)
This pose builds leg strength and opens the hips and side body.
- My technique involves first positioning myself properly by turning my right side toward the chair. Next I take a wide stance with my right foot at a 90 degree angle. Then I put my right hand on the chair and the left hand fully extended overhead. In this position I hold on for a while and then I change to the other side.
6. Supported Half Moon Pose
A more advanced balance pose that the chair makes possible.
- How I Do It: From Triangle Pose on the right side, I bend my right knee and place my left hand on my hip. I put my right hand on the chair a few inches in front of my right foot. I slowly shift my weight over to my right leg and raise my left leg until it is parallel to the floor. I may keep my left hand at my hip or extend it out. The chair is my anchor.
7. Supported Reverse Warrior (Viparita Virabhadrasana)
This is a powerful heart opener and strengthens the legs.
- How I Do It: From a wide-legged stance, I turn my right foot out. I drop my right knee into a lunge which I keeping my shin very vertical. My left hand is on my left leg. I extend my right arm behind me and arch slightly, and look up. The chair is a support if I need to touch it with my left hand.
Building a Routine That Works For Me
I started with just ten minutes a day. Now, I rarely miss a twenty-minute session. Here’s a sample routine I might follow:
- Minutes 0-2: Seated Mountain Pose – focusing on my breath.
- Minutes 2-5: Seated Cat-Cow – warming up the spine.
- Minutes 5-10: Seated twists and arm stretches (Cow Face, Eagle Arms).
- Minutes 10-15: Standing poses – I’ll pick 2-3, like Tree Pose and Supported Triangle.
- Minutes 15-20: A final forward fold like Puppy Pose over the chair, then back to Seated Mountain to finish.
The Bottom Line: This is About Your Independence
I started practicing chair yoga out of fear of falling and injury. I continued because it helped me regain a sense of control. I feel stronger, more stable, and more comfortable in my body. The analytics support my claim, however my experience is what matters. This is a highly effective and useful resource. This is not a concession — I refer to it as a masterful revision of my approach.
You don’t have to accept stiffness and weakness as a given. Get a chair, try out a pose today and see how you feel. Your path back to strength begins right there.