
Upward Facing Dog Benefits
I would hurryly go through the Upward Facing Dog, as a mere stop between a low plank and a Downward Dog. I was only doing it wrong until I got a twinge in my lower back and thought I was wrong. My experience of learning this pose has shown that it is not merely a transition–it is an incredibly strength-building heart-opener in its own right.
And in the right place are you have ever felt tight, bent over by hours on a desk or simply needed to stretch your back and give it a beautiful strong bend into your practice. We can go through the practice of Upward Facing Dog and see how it can be practiced with ease and strength.
My Balancing Upward Facing Dog.
Updog became a word which I frequently heard during the first years of yoga since in vinyasa classes, people often heard instructions and rarely received specific guidance. I would jump into it and leave the lower part of my back to do the work. It was clumsy and there were even times when I would even experience a pinching in my spine.
This was liberating as a teacher came and noted that my proportions of body as far as shorter arms and longer tors,d did not suit the standard pose that they used. My hips would be on the floor with straight arms and I was not able to achieve the spinal extension I desired. I was attempting to pose like everyone else and failing since my body can only do what my body can do. This was a milestone in me.
I began putting blocks under my hands to pretend that I was making my arms longer and – suddenly I was able to feel the real backbend. It felt incredible. The lesson I learned here was that Upward Facing Dog is neither a universal pose nor a one-size-fits-all, but rather learning how to get it right, what the pose does, and how to adjust it is the most important part to a healthy and empowering practice.
What is Upward Facing Dog?
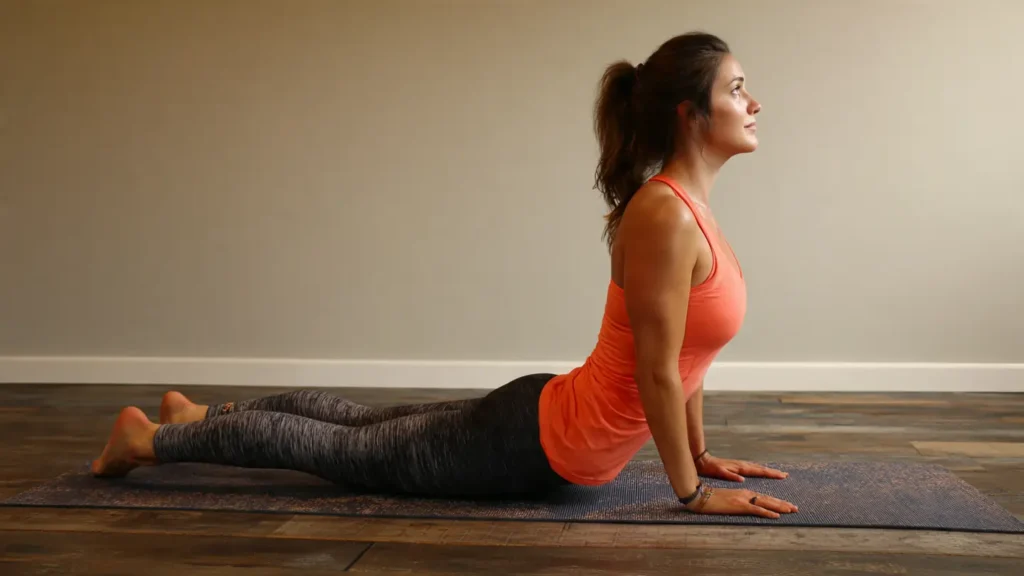
This pose is called in Sanskrit Urdhva Mukha Svanasana (urdhva = upward, mukha = face, svana = dog) and is a backbend in yoga. It is a prone backbend, that is, you begin lying on your stomach, and you are raising nearly your entire body off the mat and using only your hands and the tops of your feet.
It is part of the Sun Salutation series, and common in Vinyasa flows, where it generally follows Chaturanga (a low-plank) and comes before Downward-Facing Dog. However, when I learned, it is so much more than a simple transition. Personally, it has now become a time to reclaim some space in the front of my body opening up through my chest, throat and heart. It is an attitude that requires you to be tough and gentle simultaneously.
Here are reasons as to why you should incorporate Upward Facing Dog in your routine.
This is a super powerhouse of advantages, particularly in our contemporary sedentary world. This is what I have noticed through a regular and conscious exercise:
It Contraposes Desk Posture: If you, like me, are spending hours behind a computer, this is a great antidote to this. It opens the chest and collarbones very strongly and the rounding of the spine is reversed to regain good posture.
It Tones Your Back and Arms: Upward Facing Dog is a pose that uses the muscles on your whole spine, which will make them stronger and more enduring. It also works out your arm muscles and makes your wrists strong in the process when you push the weight of your body down through your palms.
It Energizes You and Your Spirit: Backbends such as this are regarded as extroverted poses. I have discovered that it can be a good exercise to counteract the habit of curling up when we are stressed or overwhelmed and it produces a refreshing and invigorating action.
It Strengthens the Breathing: This pose can increase the lung capacity and the deeper, more relaxed breathing, which is especially beneficial to any person with respiratory tension.
It Workouts the Lower Body: You will not be deceived–legs are busy at work in this position! Pulling your thighs and pelvis off the mat tightens your hamstrings, glutes and calves.
This is my step-by-step tutorial on how to do a Perfect Upward Facing Dog.
These are the steps to take in order to construct the pose safely up to the ground.
Step 1: The Setup
I begin with lying on my stomach on my yoga mat. I draw my legs, and maintain them at a distance of about hips. And there I stand the tops of my feet on the ground. My hands are put on the mat, and the fingers are open with the fingertips following my lower ribs or lower chest. The most important advise I have always kept in mind is to turn my wrists directly below my elbows when I later straighten my arms. My elbows are kept close around the ribs, and not straight out.
Step 2: Lifting Up
I squeeze my hands together on an inhalation. I work on making sure that I roll back and down my shoulders before even beginning to straighten my arms. I have a chest first, not chin first head and all of the upper body. Then I push the tops of my feet down and I push my knees, thighs and hips off the floor. My arms stretch up (without locking at the elbows) and my hands and top feet now hold me.
Step 3: Finding Refinement
It is the magic that occurs here. These are the cues that I go through my head:
Legs: I squeeze my inner thighs and squeeze them towards the ceiling and push off through the knucksles of my pinky toes to prevent my legs being spread out.
Core: I also pull my belly button towards my spine in order to stabilize my lower back and avoid dumping to my lumbar spine.
Chest: I visualize myself pushing my sternum in and up, via this opening of my arms, widening my collarbones.
Neck and Head: I have the back of my neck long. I do not throw my head back, but kind of raise my eyes, visualizing that my head crown is stretching out. The greater part of the movement must be made out of the very top of your neck.
Breath: I maintain the posture 3-5 breaths of full rich breath, and I relish the openness in my chest.
Essential Fallacies I Once Made (And How to Prevent Them).
It was also important to me to learn what not to do. The following are the big four mistakes and how they can be corrected:
Shoulders Shrugging to the Ears: This causes such tension in the neck. I instead willingly squeeze my hands into the floor and pull my shoulders blades down my back to lift space between my shoulders and ears.
Allow the Thighs to Hang: When your thighs are on the floor you are already in the Cobra Pose. To get Upward Dog fully expressed, you have to raise your thighs. You need to use your quadriceps to lift your feet using the tops of your feet.
Over-Arching the Lower Back: This was my greatest problem. To correct it, I concentrate on using my core and legs to make the backbend even all along my entire spine as opposed to using it in a single point.
Externally Rotating the Legs: I can squeeze my glutes and compress my lower back when my legs are moving out. I roll the knuckles of my pinky toes into the ground, to make them be neutral, and use my big toes to reach back there.
Adaptations and Changes to Each Body.
Not all bodies are identical and so should not be your pose. The following changes that rescued my practice are:
In case of Shorter Arms or Tighter Shoulders: This was my answer! By placing a yoga block under your hands you will have the extra height to lift and extend your spine correctly without effort.
Alternative: Cobra Pose (Bhujangasana) is a great substitute to a Gentler Backbend. Your elbows are bent, and your thighs, hips and pelvis against the ground. It gives one a beautiful chest opening and is not as intense as the complete Upward Dog.
In the case of Wrist or Lower Back Sensitivity: Sphinx Pose. You have your forearms on the ground, which removes all pressure on the wrists and results in a very rigored backbend. It is also possible to put a folded blanket under your thighs or hips to provide support.
Practice Yoga according to the needs.
Pose Best For How It Differs
Existing damage to your wrists, shoulders, neck, or lower back.
In case you are pregnant, particularly during the second and third trimesters.
When you have a headache or are suffering carpal tunnel syndrome.
Always listen to your body. When something pinches or hurts, hold back. A modified version is preferable to taking a risk of injuring oneself.
Frequently Asked Questions (FAQs
What is the principal distinction between Cobra Pose and Upward Facing Dog?
The main difference is that in the pose of Upward Dog the thighs, hips and pelvis are not touching the floor, and the arms are straight. In Cobra, your legs and hips remain fixed on the ground, and your arms are able to bend. Upward Dog is a more total body strengthener whereas Cobra is a softer chest opener.
What is causing the pain in my wrists in this pose and what should I do?
Poor weight distribution or tight shoulders are the causes of the wrist pain. Make certain that you are pushing equally all through your fingers and knuckles. You may also attempt to hug your wrists right under your shoulders. In the meantime, to alleviate the symptoms, practice Cobra or Sphinx Pose instead, or place yoga blocks to reduce the range of your wrists.
I feel a pinch in my lower back. What am I doing wrong?
This is super common! It normally implies that you are squeezing on your lower back. Since you are lifting a heavy, concentrate on the use of your core and legs to help. Just stretch your tailbone straight up to your heels. As long as the pinching persists, continue with Cobra Pose until you are able to develop a stronger core and a greater range of motion on the spine.
What is the Holding time of Upward Facing Dog?
With dynamic vinyasa flow, you may only have one breath. However, when doing it independently, please make it hold between 3 and 5 deep breaths to be able to get the benefits.
Upward Facing Dog helped me understand that yoga is not about attaining the perfect-looking pose, but rather locating the expression of the pose that fits your particular body. It is a discipline of consciousness, tolerance and self-exploration. Then, roll out your mat, come and play with this mighty backbend and reap its transforming gifts yourself.